<?xml version="1.0" encoding="utf-8"?><feed xmlns="http://www.w3.org/2005/Atom" ><generator uri="https://jekyllrb.com/" version="4.2.2">Jekyll</generator><link href="https://pixelatto.com/feed.xml" rel="self" type="application/atom+xml" /><link href="https://pixelatto.com/" rel="alternate" type="text/html" /><updated>2024-09-12T09:41:47+00:00</updated><id>https://pixelatto.com/feed.xml</id><title type="html">Pixelatto | Creative games and tools</title><subtitle>We made Reventure, Card Creator and other gamedev tools!</subtitle><entry><title type="html">Why Should I Get Tabletop Creator</title><link href="https://pixelatto.com/blog/why-should-i-get-tabletop-creator" rel="alternate" type="text/html" title="Why Should I Get Tabletop Creator" /><published>2022-10-05T07:25:59+00:00</published><updated>2022-10-05T07:25:59+00:00</updated><id>https://pixelatto.com/blog/why-should-I-get-tabletop-creator</id><content type="html" xml:base="https://pixelatto.com/blog/why-should-i-get-tabletop-creator"><![CDATA[<p>We want to talk to you about Tabletop Creator.</p>

<p>First of all, let’s put ourselves in context: we are all passionate about board games, we have fun playing them and we are creative and full of ideas.</p>

<p>At some point, while playing your favorite game, we find a reflection inside ourselves: “I really would love to <strong>create my own board game</strong>. I have such a good idea but… How should I start? How can I <strong>create that board game</strong>?”</p>

<p>That is a great question! And that is why we ended creating Orbtale at the same time we developed an application for making our life easier: <strong><a href="https://pixelatto.com/store/tabletop-creator/">Tabletop Creator</a></strong>.</p>

<p>Let’s have a look at it!</p>

<hr />

<h2 id="what-is-tabletop-creator">W﻿hat is Tabletop Creator?</h2>

<p><strong><a href="https://pixelatto.com/store/tabletop-creator/">T﻿abletop Creator</a></strong> is a board game maker tool that allows you to design, customize and export your game in a professional, easy and fast way. In the same way Adobe provides tools for image edition or Unity for video game development, Tabletop Creator counts with a tool set for making it easy to create whatever game component you want, customize them and export your project in different formats to get it physically or to play it online.</p>

<p>D﻿o you want to know more? Just see our trailer and keep reading!</p>

<figure class="image is-16by9" style="border-radius: 30px 0px 30px 0px; overflow: hidden;">
    <iframe class="has-ratio" width="640" height="360" src="https://www.youtube.com/embed/CK0ZA9Cp0xA" title="YouTube video player" frameborder="0" allow="accelerometer; autoplay; encrypted-media; gyroscope; picture-in-picture" allowfullscreen="">
    </iframe>
</figure>

<hr />

<h2 id="some-interesting-features">Some interesting features</h2>

<p>When you are interested in creating your own board games, you can find many tutorials about it on the Internet. <strong>Creating a board game</strong> may become a very difficult task.</p>

<p>You would need to know lots of things to do it properly: you need to know how about game designgame, graphics edition, narrative and many other things. And if you want to do it on your own, you may think it is crazy.</p>

<p>
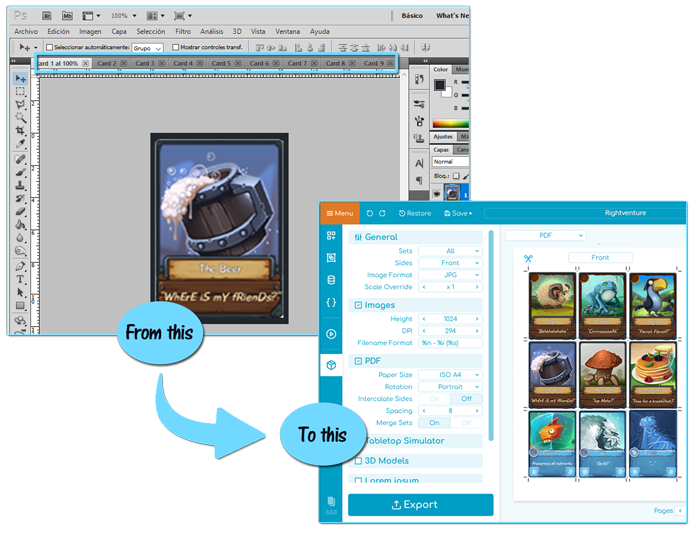
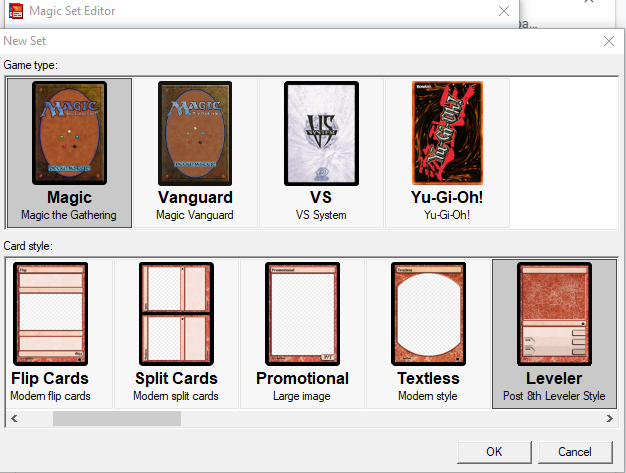
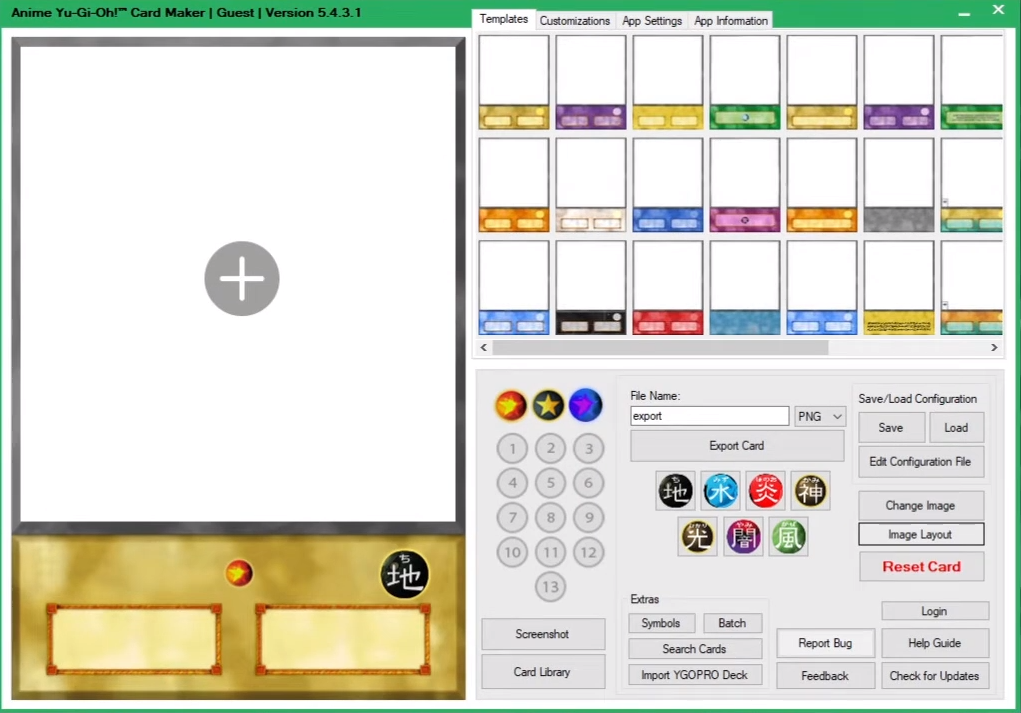
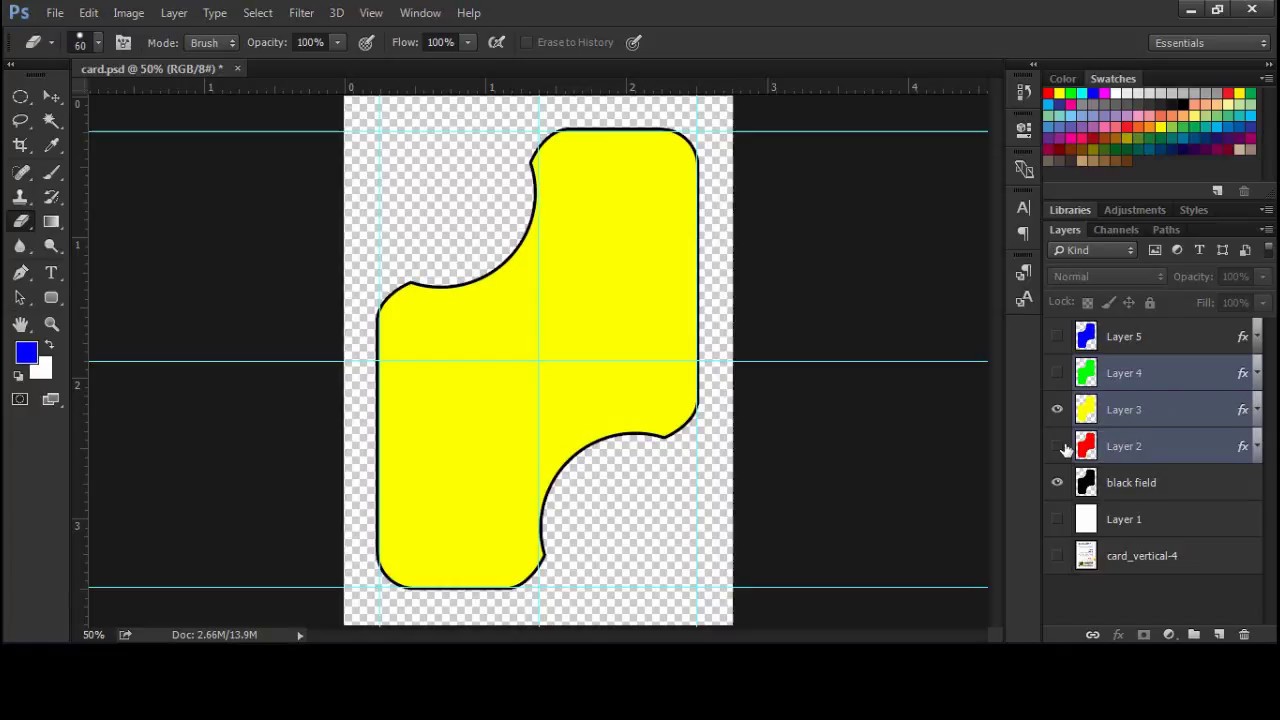
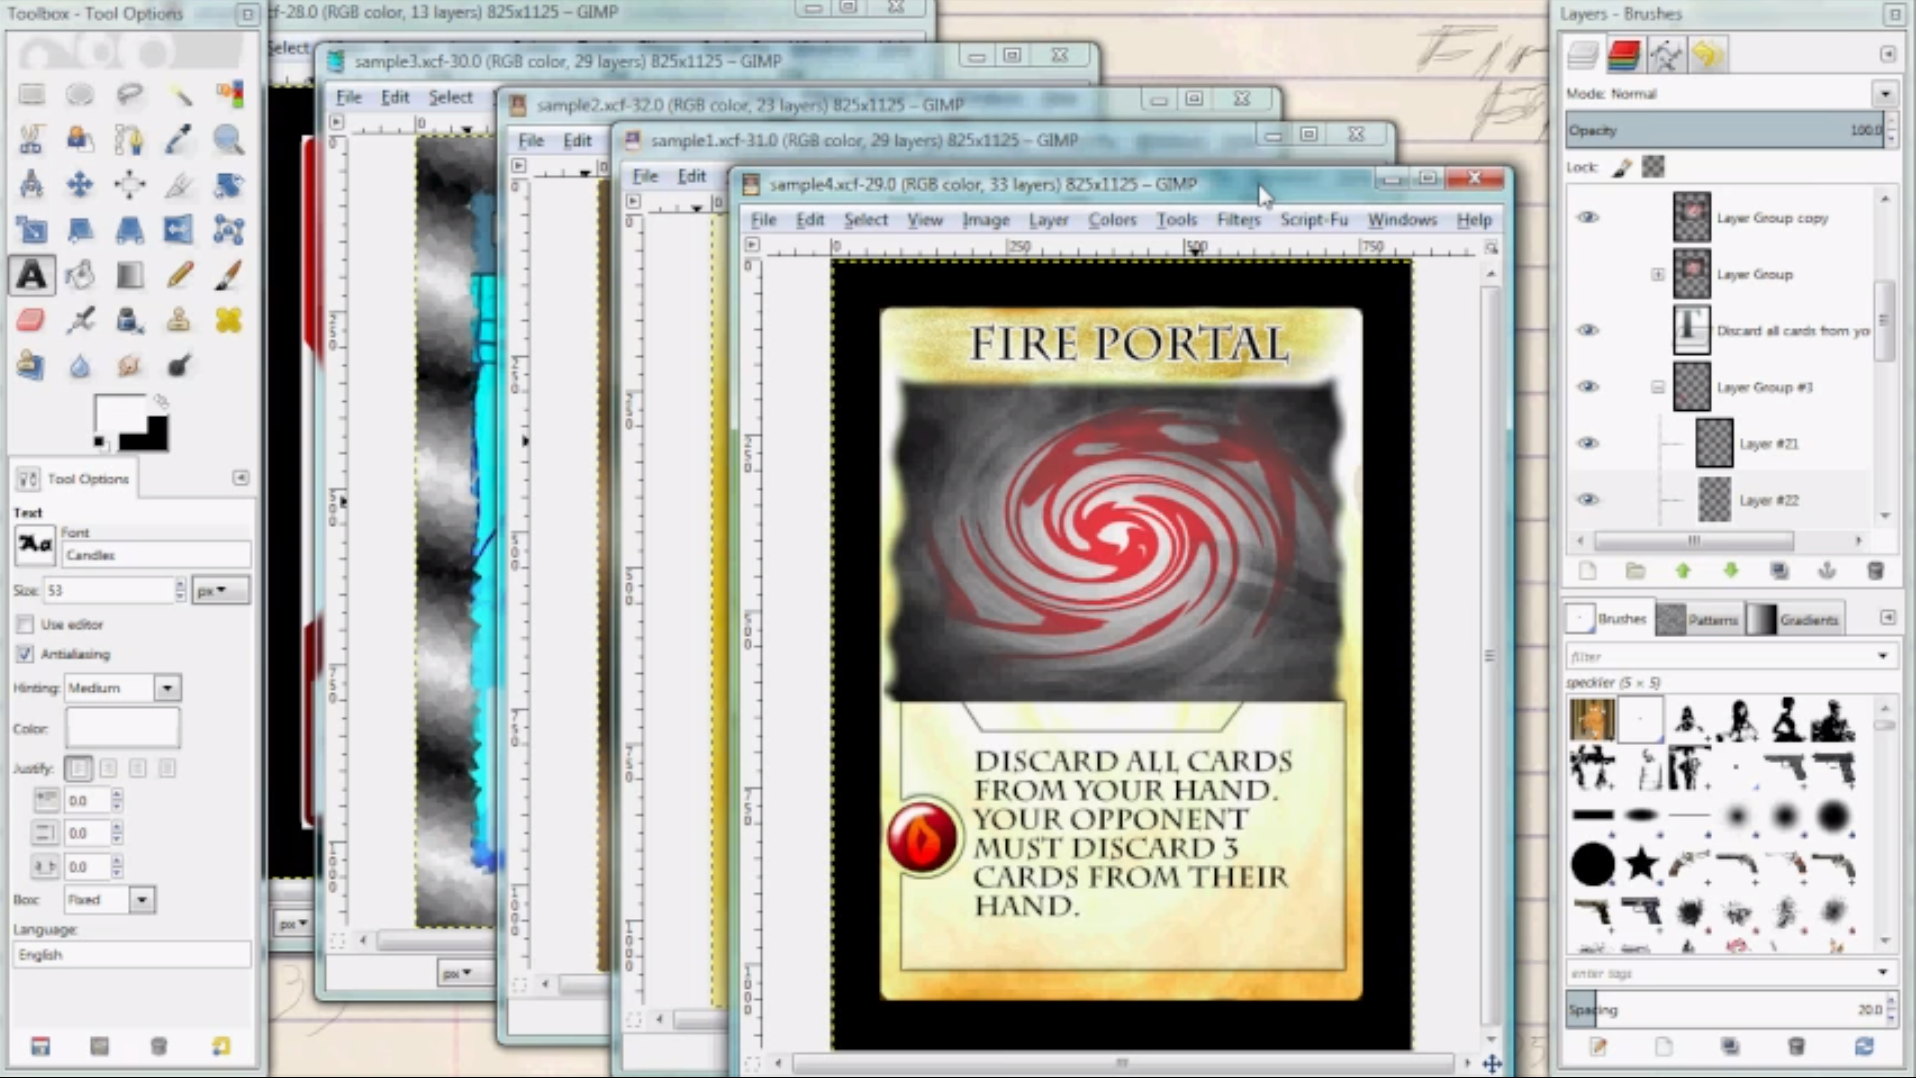
Many people used to do it by hand: drawing it, cutting all items and doing modifications themselves. Later, graphic design tools like Photoshop are really useful for working on your graphics, but it is not flexible and powerful enough for support fast iterations - it takes too much time to do changes to your cards.</p>

<p>Fortunately, that will not be a problem anymore with <strong><a href="https://pixelatto.com/store/tabletop-creator/">Tabletop creator</a></strong>!</p>

<p><img src="/img/upload/tabletopcreator_hompage1.png" alt="Tabletop Creator homepage" title="Tabletop Creator homepage" /></p>

<p>We will tell you some good features about the application <strong><a href="https://pixelatto.com/store/tabletop-creator/">Tabletop Creator</a></strong>:</p>

<ul>
  <li>
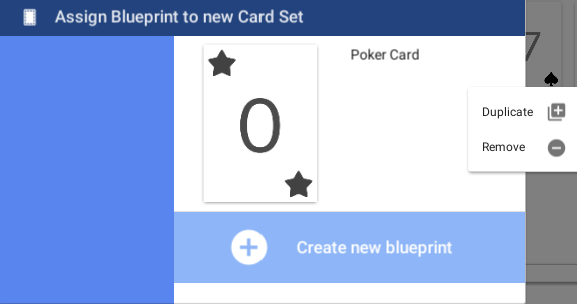
You can have your great idea and capture it easily on <strong>Tabletop Creator</strong>.</li>
  <li>
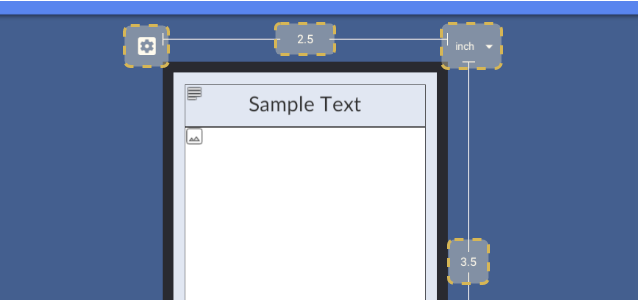
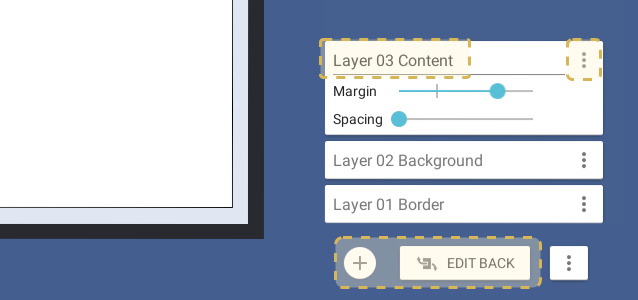
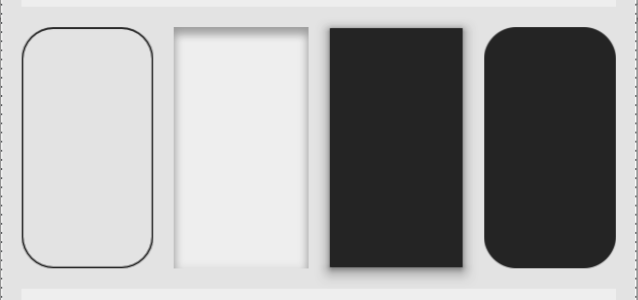
You can design your templates. Take out what is on your mind!</li>
  <li>
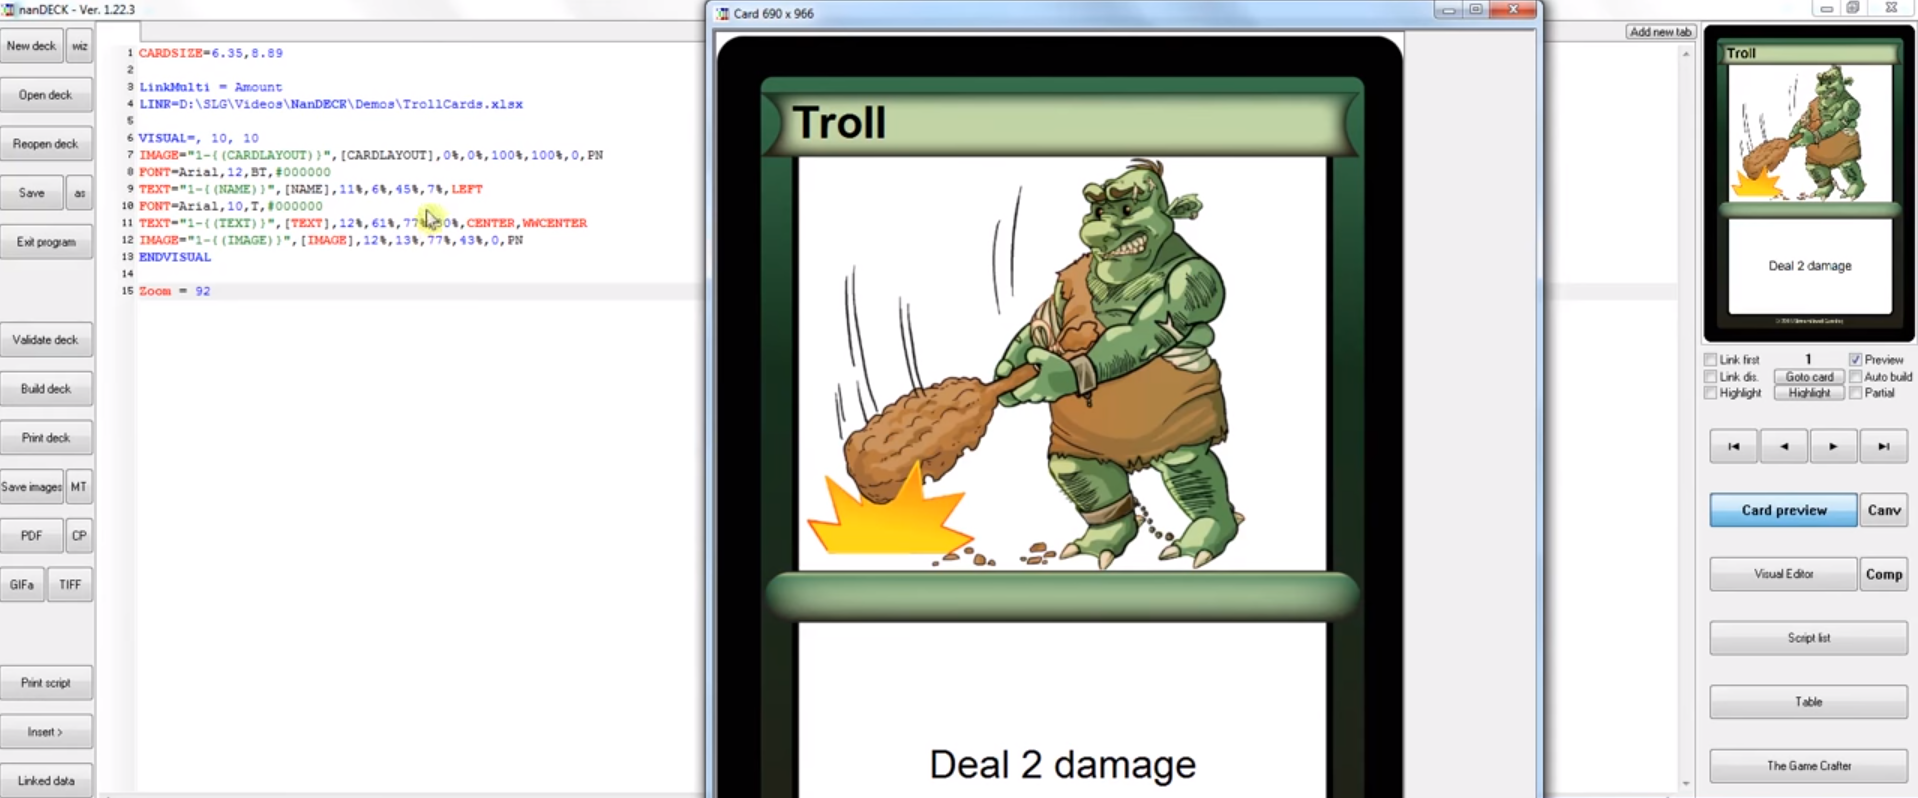
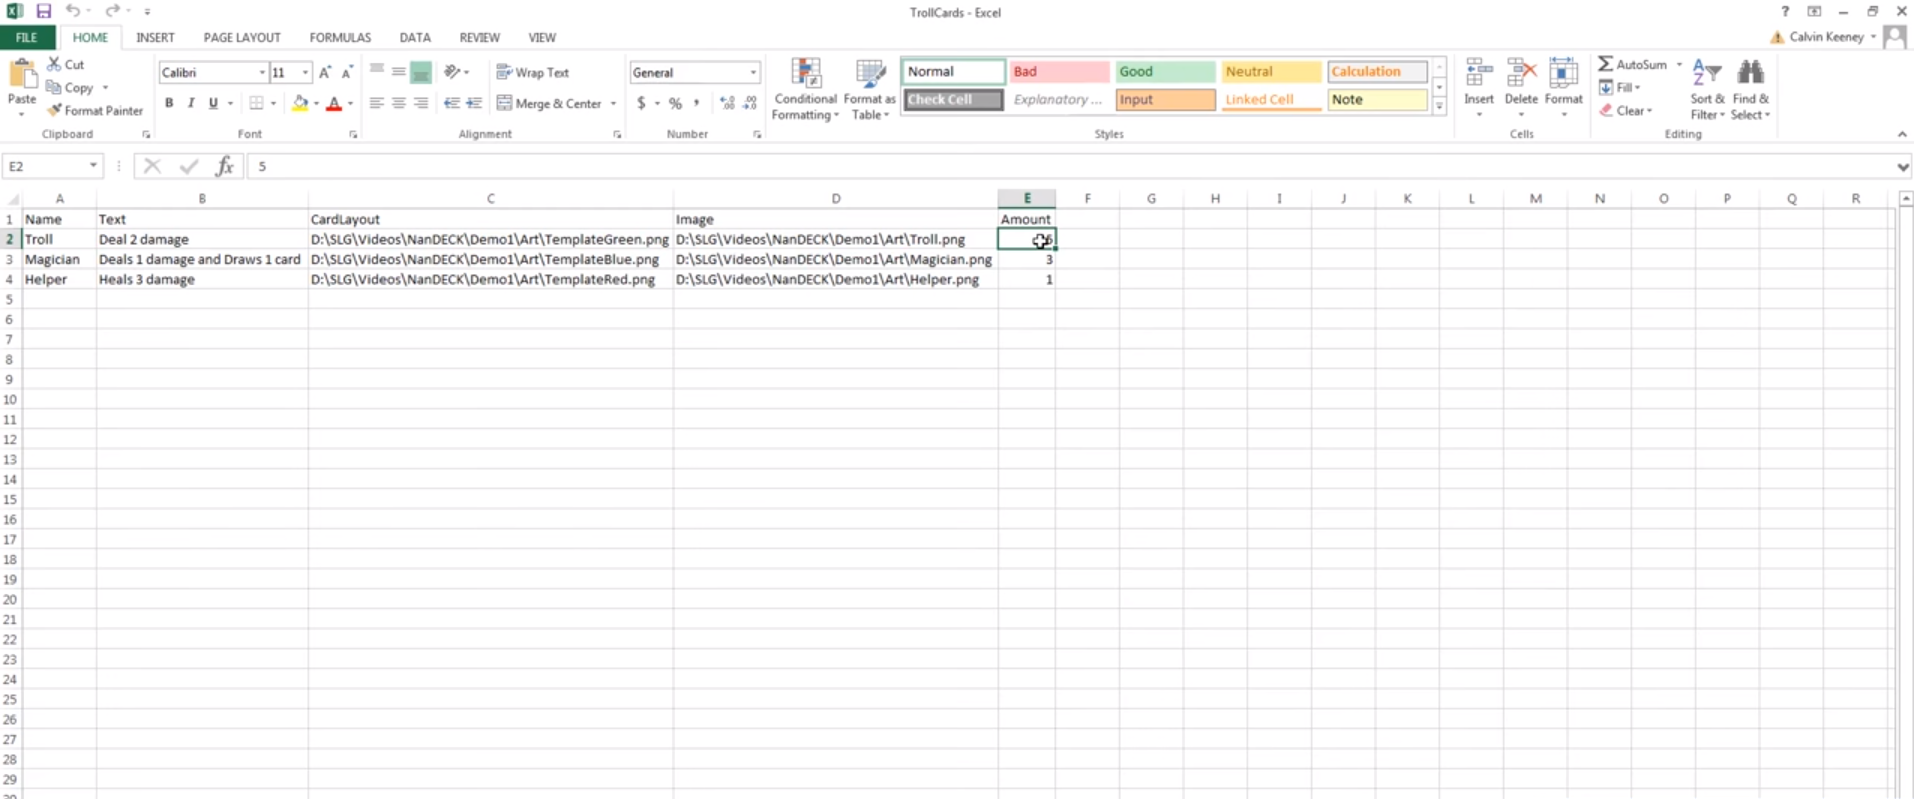
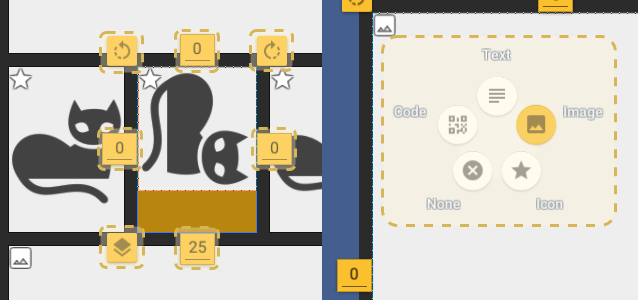
You can create all cards you need for your board game and customize all of them almost in one click.</li>
  <li>
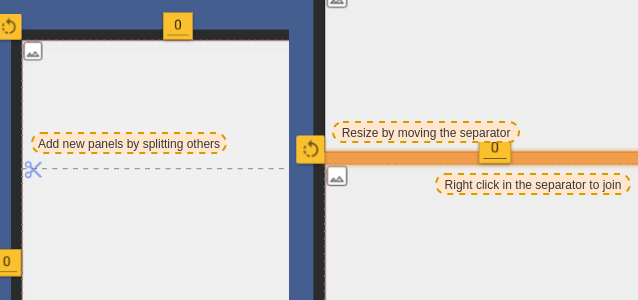
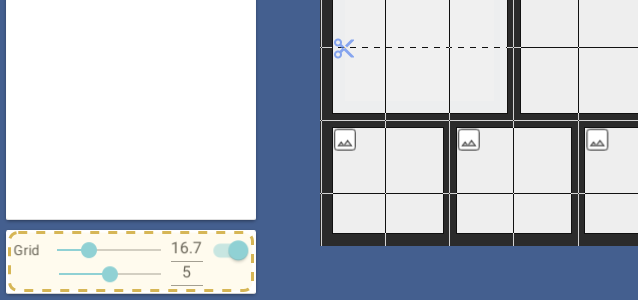
You probably need to do some mass edit to your items. We know edit all of them in Photoshop is exhausting, but it doesn’t need to be that crazy. Organize all of them in one view and do it easily.</li>
</ul>

<p><img src="/img/upload/tabletop-creator_from-this-to-this.png" alt="Tabletop Creator_from this to this" /></p>

<ul>
  <li>Do you need a board to your game, right? You can create yours too.</li>
  <li>Tabletop Creator allows you to get printable docs with cut marks to test and play your game.</li>
  <li>And what about your game box? For physical games, it is appropriate to have one and you can do it too by designing and assembling.</li>
  <li>But, if you don’t want to have it physically, then is ok too. You can use it to play your created game online. You can import your game to digital simulators like <em>Tabletop Simulator</em> or <em>Tabletopia</em>.</li>
</ul>

<hr />

<h2 id="in-conclusion">In conclusion…</h2>

<p><strong><a href="https://pixelatto.com/store/tabletop-creator/">Tabletop Creator</a></strong> has a super intuitive interface that allows you to do an infinity number of possibilities in order to create your own board game. There is no need to worry about getting lost in the app. It is completely user-friendly and easy to use. <strong>Tabletop Creator</strong> application has a guide, which is very easy to understand, and contains step-by-step instructions that will have you making plays and experimenting with your own rules within minutes.</p>

<p>Do not hesitate any longer. Try it. Dream. Have fun. Play. Create. Be the master <strong>creating board games</strong>!</p>

<p>There is only one thing you need: imagination and good ideas to <strong><a href="https://pixelatto.com/store/tabletop-creator/">create your own board game</a></strong>! <strong>Tabletop Creator</strong> will handle the rest.</p>

<hr />

<h2 id="where-can-i-get-tabletop-creator">Where can I get Tabletop Creator?</h2>

<p>I﻿f you’ve read this far, you may be interested on create your own board game easily. You can buy the application in the next link:</p>

<p><a href="https://pixelatto.com/store/tabletop-creator/">«&lt; Link to Tabletop Creator »&gt;</a></p>

<p>B﻿ut if you are not sure if this is for you or not (although we know it is), then there is another option to test it. You can try our demo version for free in our Steam page:</p>

<p><a href="https://store.steampowered.com/app/861590/Tabletop_Creator/">&lt;﻿« Link to Tabletop Creator Demo »&gt;</a></p>

<p>H﻿ave fun!</p>]]></content><author><name>Esther de Paz</name></author><category term="Tabletop Creator" /><category term="Guides" /><summary type="html"><![CDATA[Becasue you love board games and you are thinking about to create your own!]]></summary><media:thumbnail xmlns:media="http://search.yahoo.com/mrss/" url="https://pixelatto.com/img/upload/tabletop-creator_why-do-you-need-it.png" /><media:content medium="image" url="https://pixelatto.com/img/upload/tabletop-creator_why-do-you-need-it.png" xmlns:media="http://search.yahoo.com/mrss/" /></entry><entry><title type="html">How To Create My Own Card Game</title><link href="https://pixelatto.com/blog/how-to-create-my-own-card-game" rel="alternate" type="text/html" title="How To Create My Own Card Game" /><published>2020-11-11T00:00:00+00:00</published><updated>2020-11-11T00:00:00+00:00</updated><id>https://pixelatto.com/blog/how-to-create-my-own-card-game</id><content type="html" xml:base="https://pixelatto.com/blog/how-to-create-my-own-card-game"><![CDATA[<h3 id="im-going-to-create-my-own-card-game-but-how">“I’m going to create my own Card Game!… but how?”</h3>

<p>There are several options when searching for “how to make a card game”, “design card game” or “card creation tool” at Google, but most of them are not oriented to games and there are several tools for doing it, so we ended up testing them and creating <strong><a href="http://www.pixelatto.com/store/card-creator/">Card Creator</a></strong> later.</p>

<p>Those tools have very different feature sets and goals, so depending on what your project is about you will find this or that more useful. Let’s start summarizing them!</p>

<hr />

<h2 id="nandeck">nanDECK</h2>

<p>Let’s start with one of the most powerful ones:<a href="http://www.nand.it/nandeck/"> nanDECK</a>, since this tool allows you to create different decks of cards with custom layouts composed of images, texts, icons, polygons, etc.</p>

<p><img src="/img/upload/nandeck_main_preview.png" alt="nanDECK card preview" /></p>

<p>For creating our deck of cards, we will use mainly two screens:</p>

<ul>
  <li>nanDECK main screen: where we will configure our project, preview our cards, handling decks and printing projects.</li>
  <li>Visual editor: here we can set up our cards by adding images and texts, with the support of the project excel file, where we will store all the cards data for linking it later with different areas.</li>
</ul>

<p><img src="/img/upload/nandeck_excel.png" alt="nandeck_excel" /></p>

<p>This last fact it’s important, as we will need first to set up this excel with the fields, texts and links to our images to start editing our cards. After that, we need to add a bit of code (although there is a guide available, but it has 175 pages!) for being able to start creating our cards.</p>

<p>During our test using nanDECK, we reach the following conclusions:</p>

<ul>
  <li>Pros
    <ul>
      <li>Flexibility and fast edition of the cards, thanks to the visual editor and the excel where all the data is located</li>
      <li>Handling of several decks as projects inside the application</li>
      <li>Preview and print your cards in a easy way</li>
      <li>It’s free!</li>
    </ul>
  </li>
  <li>Cons
    <ul>
      <li>There are no custom templates or blueprints that we could use to define the cards layout of our different sets, so we can make changes that are applied to all these cards at once</li>
      <li>Lack of digital integrations: project structure does not support version control (repository) for collaborating with others nor digital testing (e.g. with Tabletop Simulator)</li>
      <li>At the end, the project is developed using code, which makes harder to achieve specific results and is not trivial for the average user</li>
      <li>The whole interface is out of date, there are tons of buttons and options that require time to learn</li>
      <li>The information is not always available in the screen, which makes hard to figure out how your decks are looking in order to iterate</li>
    </ul>
  </li>
</ul>

<hr />

<h2 id="tools-based-on-existing-games">Tools based on existing games</h2>

<p>On the other hand, there is a set of tools that are very similar regarding their functionality and goal, as they provide the user with card templates from existing games, like Magic the gathering or Yu-Gi-Oh!</p>

<p>Let’s cover a couple of them quickly: <a href="http://magicseteditor.sourceforge.net/">Magic Set Editor</a> and <a href="https://www.aygocm.co.uk/">Yu-Gi-Oh! Card Maker</a>.</p>

<p>As mentioned above, these tools provide the user with different templates from other games, which is very handy in case you are looking for extending those for playing with your friends or something similar.</p>

<p><img src="/img/upload/magic_1.gif" alt="magic_1" /></p>

<p>Starting with Magic Set Editor, it provides templates for:</p>

<ul>
  <li>Magic the Gathering</li>
  <li>Magic Vanguard</li>
  <li>Yu-Gi-Oh!</li>
  <li>VS System</li>
</ul>

<p>All you need to do is: to install the program, open it, choose create a new deck and the game and template you want to use for your card.</p>

<p><img src="/img/upload/magic_2.PNG" alt="magic_2" /></p>

<p>It is very similar to Yu-Gi-Oh! Card Maker, where at opening the program we will see a lot of templates from Yu-Gi-Oh! card game, so we can select the one we want and start customizing the images and texts to create our card set to extend the game or to create our own personalized deck.</p>

<p><img src="/img/upload/anime_yugioh.png" alt="anime_yugioh" /></p>

<p>In both applications we found the same pros and cons:</p>

<ul>
  <li>Pros
    <ul>
      <li>No code and very easy to use for an extend public</li>
      <li>Very straightforward: since are based on existing games, there is a lot of work already done on the templates</li>
    </ul>
  </li>
  <li>Cons
    <ul>
      <li>Too much limited: we can just create cards similar to the existing games</li>
      <li>UI outdated: It could be more friendly and fresh</li>
    </ul>
  </li>
</ul>

<hr />

<h2 id="graphic-design-tools">Graphic design tools</h2>

<p>There is also the option of using a graphic design software, like<a href="https://www.adobe.com/es/products/photoshop.html"> Photoshop</a>,<a href="http://www.gimp.org.es/"> Gimp</a> or<a href="https://inkscape.org/"> Inkscape</a>, for creating our card game and printing them later.</p>

<p>This option results quite logic when thinking that graphics need to be done on these tools anyway, as other software oriented to card creation does not support graphic edition (are two different types of product indeed).</p>

<p><img src="/img/upload/photoshop.jpg" alt="photoshop" /></p>

<p>Our experience was that, for making the cards graphic design, these tools allow you to generate any layout you may want, with unlimited flexibility and with all the benefits of using a professional tool like Photoshop: “what could go wrong?”.</p>

<p>While it is true that after checking the options so far this one seems to be the best for designing our cards, we will find the problems later, since handling dozens or even hundreds of cards in these kinds of software could result on a complete chaos, not to mention that making massive changes will become a nightmare of layers and independent texts and images.</p>

<p><img src="/img/upload/gimp.png" alt="gimp" /></p>

<p>At this point we went back in time and started thinking: “hmm, perhaps we should make our art assets using photoshop, but we should handle cards and decks with another tool similar to nanDECK…”.</p>

<p>SPOILER: we were getting closer to the point we decided to make our own Card Creation software, <a href="https://pixelatto.com/store/card-creator/"><strong>Card Creator</strong></a>.</p>

<ul>
  <li>Pros
    <ul>
      <li>100% flexibility designing graphics for our cards</li>
      <li>A lot of templates and resources already available on Internet</li>
      <li>Accessible to an extensive public</li>
    </ul>
  </li>
  <li>Cons
    <ul>
      <li>Handle tons of different types of cards with these tools would result in chaos</li>
      <li>There is no support for making massive changes easily</li>
      <li>For more professional results it might need deep learning of the tool</li>
      <li>In short, these tools are designed for developing graphics, not for card games creation</li>
    </ul>
  </li>
</ul>

<hr />

<h2 id="conclusion">Conclusion</h2>

<p>If you read the spoiler above you probably know the answer. We needed a tool to generate the graphics, and that point is very clear, but we also wanted a tool that allows us to:</p>

<ul>
  <li>Generate our own card templates (like the ones available for other games in Magic Set Editor) in a visual way, so we can change those affecting all our current cards in a deck.</li>
  <li>Handle different decks and create new cards easily based on these templates</li>
  <li>Make massive changes on the template or the data (like the excel/csv file at nanDECK)</li>
  <li>Collaborate with other remotely and to test it on digital platforms</li>
</ul>

<figure class="image is-16by9" style="border-radius: 30px 0px 30px 0px; overflow: hidden;">
    <iframe class="has-ratio" width="640" height="360" src="https://www.youtube.com/embed/liMw3yfeTdo?rel=0" frameborder="0" allow="accelerometer; autoplay; encrypted-media; gyroscope; picture-in-picture" allowfullscreen="">
    </iframe>
</figure>

<p>So we have finally arrived… here is when we decided to make <a href="http://www.pixelatto.com/store/card-creator/"><strong>Card Creator</strong></a>, the card creation tool that allows you to do all that and more! And this was its origin and the reason for its existence.</p>]]></content><author><name>Fali Ronda</name></author><category term="Card Creator" /><category term="Guides" /><summary type="html"><![CDATA[Discover different approaches for creating your own card game]]></summary><media:thumbnail xmlns:media="http://search.yahoo.com/mrss/" url="https://pixelatto.com/img/upload/create-card-game.jpg" /><media:content medium="image" url="https://pixelatto.com/img/upload/create-card-game.jpg" xmlns:media="http://search.yahoo.com/mrss/" /></entry><entry><title type="html">Pixelatto 2 0 New Website And Logo</title><link href="https://pixelatto.com/blog/pixelatto-2-0-new-website-and-logo" rel="alternate" type="text/html" title="Pixelatto 2 0 New Website And Logo" /><published>2020-09-14T08:44:39+00:00</published><updated>2020-09-14T08:44:39+00:00</updated><id>https://pixelatto.com/blog/pixelatto-2-0-new-website-and-logo</id><content type="html" xml:base="https://pixelatto.com/blog/pixelatto-2-0-new-website-and-logo"><![CDATA[<h2 id="weve-made-some-changes-to-our-website-and-our-logo">We’ve made some changes to our website (and our logo)!</h2>

<p><strong>Pixelatto</strong> has changed a lot since it was founded back in 2014. Our team grew up from being only a one person to six people, we have released <em>AutoTileGen, Reventure, Card Creator.</em>..and we have a lot of new projects in our timeline! Due to all that, we gave our image the <strong>change that was very much needed.</strong></p>

<p>We wanted our <strong>logo</strong> to look more friendly, and to show our two biggest goals as a company:<br />
<strong>Videogames and software development</strong>.</p>

<p>Additionally, we added some orange to the logo. Check it out!</p>

<p><img src="/img/upload/gif-high-res.gif" alt="" /></p>

<p>On the other hand, our <strong>website</strong> has changed in order to be able to <strong>contain a lot of new stuff</strong>!</p>

<p>We will be posting here info about all our new projects, guides for the existing ones, and tons of content.</p>

<p>Stay tuned!</p>]]></content><author><name>Adri Nuñez</name></author><category term="Pixelatto" /><summary type="html"><![CDATA[We've made some changes to our website and logo - store, blog and more!]]></summary><media:thumbnail xmlns:media="http://search.yahoo.com/mrss/" url="https://pixelatto.com/img/upload/pixelatto2020logo.svg" /><media:content medium="image" url="https://pixelatto.com/img/upload/pixelatto2020logo.svg" xmlns:media="http://search.yahoo.com/mrss/" /></entry><entry><title type="html">How To Restore Your Projects Using Backups</title><link href="https://pixelatto.com/blog/how-to-restore-your-projects-using-backups" rel="alternate" type="text/html" title="How To Restore Your Projects Using Backups" /><published>2020-06-24T10:03:51+00:00</published><updated>2020-06-24T10:03:51+00:00</updated><id>https://pixelatto.com/blog/how-to-restore-your-projects-using-backups</id><content type="html" xml:base="https://pixelatto.com/blog/how-to-restore-your-projects-using-backups"><![CDATA[<p>Restoring a backup in Card Creator is a <strong>really simple</strong> process.</p>

<p>Just need to:</p>

<p><strong>1)</strong> Open the backups folder inside your Card Creator project and choose the backup .zip file you want to restore (those are named by the date and time they were created!)</p>

<p><img src="/img/upload/restore_1.png" alt="" /></p>

<p><strong>2)</strong> Unzip all the files inside the data folder in your Card Creator project (make sure a new backup as been done or make a copy yourself!)</p>

<p><img src="/img/upload/restore_2.png" alt="" /></p>

<p><strong>3)</strong> Enjoy your restored project!</p>]]></content><author><name>Fali Ronda</name></author><category term="Card Creator" /><category term="Guides" /><summary type="html"><![CDATA[Learn how the backups system works and how to restore them]]></summary><media:thumbnail xmlns:media="http://search.yahoo.com/mrss/" url="https://pixelatto.com/img/upload/restore.png" /><media:content medium="image" url="https://pixelatto.com/img/upload/restore.png" xmlns:media="http://search.yahoo.com/mrss/" /></entry><entry><title type="html">The Project Structure And How To Duplicate It</title><link href="https://pixelatto.com/blog/the-project-structure-and-how-to-duplicate-it" rel="alternate" type="text/html" title="The Project Structure And How To Duplicate It" /><published>2020-06-24T10:02:55+00:00</published><updated>2020-06-24T10:02:55+00:00</updated><id>https://pixelatto.com/blog/the-project-structure-and-how-to-duplicate-it</id><content type="html" xml:base="https://pixelatto.com/blog/the-project-structure-and-how-to-duplicate-it"><![CDATA[<h2 id="project-structure">Project Structure</h2>

<p>When you create a new project in Card Creator, it will create several folders and files inside your project folder:</p>

<p><img src="/img/upload/untitled.png" alt="The%20project%20structure%20and%20how%20to%20duplicate%20it%2046d5258bc7454b8f9069cfe2695e392a/Untitled.png" /></p>

<p>Let’s talk about these elements.</p>

<h3 id="cc-file">.cc file</h3>

<p>This file <strong>is not the project</strong>. Card Creator uses this file as an “anchor” to open your project, but all the information about your blueprints, cards, images, etc, are not contained here.</p>

<h3 id="assets-folder">Assets folder</h3>

<p>This folder content will be like the following picture:</p>

<p><img src="/img/upload/untitled-1-.png" alt="The%20project%20structure%20and%20how%20to%20duplicate%20it%2046d5258bc7454b8f9069cfe2695e392a/Untitled%201.png" /></p>

<p>Here you can organize your icons and images, by creating folders inside the icon_gallery, image and images_inlines ones, in order to use them inside Card Creator.</p>

<h3 id="backups">Backups</h3>

<p>Card Creator creates periodically backups every five minutes of your work inside this folder. You can learn more about how to restore them by following the <a href="https://www.notion.so/How-to-restore-your-projects-using-backups-31f42a2c1ebc4b429883a0b7b6a8e415">How to restore your projects using backups</a>  guide.</p>

<p><img src="/img/upload/untitled-2-.png" alt="The%20project%20structure%20and%20how%20to%20duplicate%20it%2046d5258bc7454b8f9069cfe2695e392a/Untitled%202.png" /></p>

<h3 id="data">Data</h3>

<p>Here are located <strong>really important json files</strong>, as those are the ones that define your blueprints, cardsets, variables, etc. This files are the ones copied by card Creator during the backup process.</p>

<p><img src="/img/upload/untitled-3-.png" alt="The%20project%20structure%20and%20how%20to%20duplicate%20it%2046d5258bc7454b8f9069cfe2695e392a/Untitled%203.png" /></p>

<h3 id="output">Output</h3>

<p>Card Creator will generate here a new folder everytime you do a new export of a cards set, creating all the exported files inside it.</p>

<h3 id="temp">Temp</h3>

<p>Just temporally files, nothing to worry about!</p>

<h2 id="duplicating-a-project">Duplicating a project</h2>

<p>Taking into account how the projects structure works, duplicating a project is a <strong>really simple</strong> process:</p>

<p><strong>1)</strong> <strong>Copy the whole folder of your project</strong> (which includes the .cc file and all the rest of folders and files inside them).</p>

<p><strong>2)</strong> Enjoy your new project!</p>]]></content><author><name>Fali Ronda</name></author><category term="Card Creator" /><category term="Guides" /><summary type="html"><![CDATA[Learn about the different elements of a project structure and how to duplicate projects properly]]></summary><media:thumbnail xmlns:media="http://search.yahoo.com/mrss/" url="https://pixelatto.com/img/upload/duplicate_project.png" /><media:content medium="image" url="https://pixelatto.com/img/upload/duplicate_project.png" xmlns:media="http://search.yahoo.com/mrss/" /></entry><entry><title type="html">How To Report Bugs And Issues</title><link href="https://pixelatto.com/blog/how-to-report-bugs-and-issues" rel="alternate" type="text/html" title="How To Report Bugs And Issues" /><published>2020-05-25T11:43:13+00:00</published><updated>2020-05-25T11:43:13+00:00</updated><id>https://pixelatto.com/blog/how-to-report-bugs-and-issues</id><content type="html" xml:base="https://pixelatto.com/blog/how-to-report-bugs-and-issues"><![CDATA[<h2 id="reporting-bugs-and-issues">Reporting bugs and issues</h2>

<p>Help us find and fix any bug you encounter!</p>

<h2 id="to-fix-a-bug-we-need">To fix a bug, we need:</h2>

<ul>
  <li>To know it exists.</li>
  <li>To know how to reproduce it.</li>
  <li>To have some time to deal with it.</li>
</ul>

<h2 id="follow-these-steps-to-report-a-bug">Follow these steps to report a bug</h2>

<ol>
  <li><strong>Close the program.</strong> This ensures that the log file is written in the “/temp/” folder of the project.</li>
  <li><strong>Describe what issue did happen and how it happened.</strong></li>
  <li>
    <p><strong>Prepare a description along with any files</strong> that could help us reproduce the bug, e.g.:</p>

    <ul>
      <li><strong>The compressed project folder</strong> (<strong>/data/</strong> and <strong>/temp/</strong> folders are specially useful).</li>
      <li><strong>Screenshots</strong>, gifs or video capture of the problem.</li>
    </ul>
  </li>
  <li><strong>Send us the info via</strong> <a href="https://steamcommunity.com/linkfilter/?url=https://discord.com/invite/pixelatto">Discord</a>.</li>
</ol>

<p>Since the project file could be a sensitive document, you may not want to send it, that’s why we recommend to create a <strong>minimal project where the issue happens</strong>.</p>

<p>A minimal project is a simple new project with the least content where the bug happens. In any case, <strong>we won’t use any of your content for other mean than fixing the bug</strong>.</p>

<h3 id="thanks-for-reporting-the-bug-well-let-you-know-as-soon-as-we-fix-it">Thanks for reporting the bug! We’ll let you know as soon as we fix it.</h3>

<ul>
  <li>
    <p><strong>Notes for older versions of CardCreator (2019 and before)</strong></p>

    <p><strong>(2.11.2 or older):</strong> They use an old project format (a single .cc file with the image assets being scattered in custom user folders) that is not supported anymore. The log file it’s located in “C:\Users\USERNAME\AppData\LocalLow\Pixelatto\CardCreator\Player.log”</p>
  </li>
</ul>]]></content><author><name>Juan Delgado</name></author><category term="Card Creator" /><category term="Guides" /><summary type="html"><![CDATA[Learn about reporting a bug on Card Creator]]></summary><media:thumbnail xmlns:media="http://search.yahoo.com/mrss/" url="https://pixelatto.com/img/upload/report_bugs.jpg" /><media:content medium="image" url="https://pixelatto.com/img/upload/report_bugs.jpg" xmlns:media="http://search.yahoo.com/mrss/" /></entry><entry><title type="html">Blueprints</title><link href="https://pixelatto.com/blog/blueprints" rel="alternate" type="text/html" title="Blueprints" /><published>2020-05-13T13:38:30+00:00</published><updated>2020-05-13T13:38:30+00:00</updated><id>https://pixelatto.com/blog/blueprints</id><content type="html" xml:base="https://pixelatto.com/blog/blueprints"><![CDATA[<h2 id="blueprint-mode">Blueprint mode</h2>

<p>In order to create your cards, first you need to create blueprints for those cards.</p>

<p>When you create a new card set, a prompt will allow you to create a new blueprint or use an existent one.</p>

<p><img src="/img/upload/bp_1.jpg" alt="" /></p>

<p>You can also edit an existing one by going to the blueprint preview image in the cardset:</p>

<p><img src="/img/upload/bp_2.png" alt="" /></p>

<p>Once you are in blueprint mode, you can rename it by clicking on it’s name in the top bar.</p>

<h3 id="card">Card</h3>

<p>First, set your card dimensions (you can change it again later). The card dimension tool will appear <strong>on mouse hover</strong>:</p>

<p><img src="/img/upload/bp_3.png" alt="" /></p>

<h3 id="layers">Layers</h3>

<p>A blueprint is composed by layers stacked on top of each other like a sandwich 🥪</p>

<p>You can add, remove, rename and sort layers using the toolbar at the right. Switch the sides of the card with the “Front/Back” button at the bottom.</p>

<p>You can also set the margin of the layer with respect to the edge of the card, and the spacing between panels per layer.</p>

<p><img src="/img/upload/bp_4.png" alt="" /></p>

<h3 id="panels">Panels</h3>

<p>Select the layer you want to edit. Then you can manage your panels:</p>

<ul>
  <li>Add a new one by splitting an existing panel.</li>
  <li>Resize by moving the separator between two panels.</li>
  <li>Delete by right-click the separator between two panels.</li>
</ul>

<p><img src="/img/upload/bp_5.png" alt="" /></p>

<p>You can enable a grid to snap your panels to the grid divisions:</p>

<p><img src="/img/upload/bp_6.png" alt="" /></p>

<p>Select a panel by clicking on it. Then you can:</p>

<ul>
  <li>Rotate it</li>
  <li>Set a padding</li>
  <li>Set the panel type (click again on the panel to show the panel type tool gizmo)</li>
  <li>Set the panel data</li>
  <li>Set the panel material (bottom left icon, see below for the effects)</li>
</ul>

<p><img src="/img/upload/bp_7.png" alt="" /></p>

<p>There are 4 types of panels:</p>

<ul>
  <li>None</li>
  <li>Text (to render text)</li>
  <li>Image (to render a custom image with alpha support)</li>
  <li>Icon (to render an icon from the gallery)</li>
  <li>Code (to generate different matrix barcodes like QR)</li>
</ul>

<p>Each panel type have different data that can be customized.</p>

<p><img src="/img/upload/bp_8.png" alt="" /></p>

<p>For the panel material, there are different types, they allow to prototype faster the look of your cards without creating custom images for the panels.</p>

<ul>
  <li>Border</li>
  <li>Hole</li>
  <li>Raised</li>
  <li>Rounded</li>
</ul>

<p><img src="/img/upload/bp_9.png" alt="" /></p>

<p>That’s all! You can now create cards based on your blueprint design. To do so, take a look on the   Collection guide!</p>]]></content><author><name>Juan Delgado</name></author><category term="Card Creator" /><category term="Guides" /><summary type="html"><![CDATA[Learn how to create card formats for your cards using the Blueprint tools.]]></summary><media:thumbnail xmlns:media="http://search.yahoo.com/mrss/" url="https://pixelatto.com/img/upload/blueprint.png" /><media:content medium="image" url="https://pixelatto.com/img/upload/blueprint.png" xmlns:media="http://search.yahoo.com/mrss/" /></entry><entry><title type="html">Collections</title><link href="https://pixelatto.com/blog/collections" rel="alternate" type="text/html" title="Collections" /><published>2020-05-13T08:52:45+00:00</published><updated>2020-05-13T08:52:45+00:00</updated><id>https://pixelatto.com/blog/collections</id><content type="html" xml:base="https://pixelatto.com/blog/collections"><![CDATA[<h2 id="create-and-edit-cards">Create and Edit Cards</h2>

<p>For this tutorial we’ll create a very basic Blueprint and create some cards using it. Open Card Creator and follow these steps:</p>

<p><strong>1)</strong> Create a new project</p>

<p><img src="/img/upload/35.png" alt="" /></p>

<p><strong>2)</strong> Add a new Card Set</p>

<p><img src="/img/upload/1128490912_preview_newset.png" alt="" /></p>

<p><strong>3)</strong> Create a new blueprint</p>

<p><img src="/img/upload/1128490912_preview_newblueprint.png" alt="" /></p>

<p><strong>4)</strong> Assign the bottom field as “Icon” type and save the blueprint. If you need more help creating blueprints you can check the guide Blueprint.</p>

<p><img src="/img/upload/1128490912_preview_CreateSimpleBlueprint.gif" alt="" /></p>

<p><strong>5)</strong> Add some cards using the “Add card” button.</p>

<p><img src="/img/upload/5.gif" alt="" /></p>

<p><strong>6)</strong> Click on a card and then on any of the fields to assign values.</p>

<p><img src="/img/upload/6.gif" alt="" /></p>

<p><strong>7)</strong> Click on the “Save” button on the top right of the screen to save your project.</p>

<p><img src="/img/upload/7.png" alt="" /></p>

<h4 id="extra-tips"><strong>Extra tips</strong></h4>

<ul>
  <li>You can specify the amount of each card you want using the input boxes below each card.</li>
  <li>You can reorder your cards via drag &amp; drop.</li>
  <li>The save icon will be highlighted whenever you have unsaved changes.</li>
  <li>You can define and use custom variables and inline icons, see the video below</li>
</ul>

<p><a href="https://i.imgur.com/xyBXPfS.mp4">https://i.imgur.com/xyBXPfS.mp4</a></p>

<h2 id="card-panels">Card Panels</h2>

<p>The card panels are the different sections of a card you can edit. You assign them on the blueprint editor with default values and then override these values as needed in the collection editor.</p>

<p>These are the currently available panel types:</p>

<h3 id="empty-panels">Empty Panels</h3>

<p>These are the default panels. They have no content or values and thus cannot be selected in the collection editor.</p>

<p>It is recommended to set as this type any panel you don’t plan to use in order to keep you design clean.</p>

<h3 id="text-panels">Text Panels</h3>

<p>You can display formatted text with these panels. One of these panels can also be set as “Card Name” in the blueprint editor advanced options so its content is used as the card name on the collection editor.</p>

<p>These fields also support rich formating for effects like bold, italic, colors and more since version 2.3.</p>

<h3 id="image-panels">Image Panels</h3>

<p>These panels are used to display images in JPG or PNG format. The URI field supports:</p>

<ul>
  <li>Local paths, e.g: C:\MyImages\MyCardGame\Player.png</li>
  <li>Online URLs, e.g.: <a href="https://steamcommunity.com/linkfilter/?url=https://www.gstatic.com/webp/gallery3/1.sm.png">https://www.gstatic.com/webp/gallery3/1.sm.png</a></li>
</ul>

<p>You can also tint you image using the tint field. Using this field without assigning an URI will result in a flat-coloured panel.</p>

<p>Try to keep your image sizes under a reasonable size. Big images will work but they’ll increase your loading and exporting times.</p>

<p>The mask URI field is optional, and allows for using an image as a mask. This feature is specially useful for oddly shaped frames (e.g: the image frames in HearthStone cards).</p>

<p>In the collection editor, click+dragging with the mouse over these fields allow you to position the image and the mouse wheel allows you to zoom in/out.</p>

<h3 id="icon-panels">Icon Panels</h3>

<p>These panels allow you to pick a flat icon from the included icon gallery and also set its main color and background color.</p>

<p>These are also very useful for using as placeholders if you don’t have any images for your game.</p>

<h2 id="create--manage-card-sets">Create &amp; Manage Card Sets</h2>

<p>A Card Set is a group of cards in your collection sharing the same format or “blueprint”.</p>

<p>You can have different card sets sharing the same blueprint or use different ones on each set.</p>

<p>To create a new card set:</p>

<p><strong>1)</strong> Create a new Card Set using the “Add Card Set” button</p>

<p><img src="/img/upload/1128490912_preview_newset.png" alt="" /></p>

<p><strong>2)</strong> The “Assign blueprint” window will be displayed so you can assign a blueprint to you new card set.</p>

<p><img src="/img/upload/9.png" alt="" /></p>

<p>You have 3 ways of creating a blueprint from this screen:</p>

<p>A) Create a new blueprint from scratch for the new set by clicking on “create new blueprint”.</p>

<p>B) Link the new card set to an already existing blueprint by clicking on the blueprint you want to use.</p>

<p>C) Create a unlinked copy of an existing blueprint so you can modify it independently by right clicking on a blueprint and then on “duplicate”.</p>

<p><strong>3)</strong> Your new Card Set is created! Depending on wich option did you use, you’ll be taken to the blueprint edit or collection screen. Either way, you’ll find your new card set back in the collection editor.</p>

<p><img src="/img/upload/10.gif" alt="" /></p>

<h4 id="extra-tips-1"><strong>Extra tips</strong></h4>

<ul>
  <li>You can rename your card sets by clicking on their name.</li>
  <li>You can reorder and remove Card Sets via the upper right dropdown menu on each card set.</li>
</ul>]]></content><author><name>Juan Delgado</name></author><category term="Card Creator" /><category term="Guides" /><summary type="html"><![CDATA[Learn how to manage your card sets, edit your card collection and more.]]></summary><media:thumbnail xmlns:media="http://search.yahoo.com/mrss/" url="https://pixelatto.com/img/upload/CardCreator_05.jpg" /><media:content medium="image" url="https://pixelatto.com/img/upload/CardCreator_05.jpg" xmlns:media="http://search.yahoo.com/mrss/" /></entry><entry><title type="html">Beta And Legacy Versions</title><link href="https://pixelatto.com/blog/beta-and-legacy-versions" rel="alternate" type="text/html" title="Beta And Legacy Versions" /><published>2020-05-11T10:00:30+00:00</published><updated>2020-05-11T10:00:30+00:00</updated><id>https://pixelatto.com/blog/beta-and-legacy-versions</id><content type="html" xml:base="https://pixelatto.com/blog/beta-and-legacy-versions"><![CDATA[<h1 id="enabling-beta-and-legacy-versions">Enabling beta and legacy versions</h1>

<p>1) Open you Steam library and make sure the “Software” category is enabled to see Card Creator</p>

<p><img src="/img/upload/1129108624_preview_01.png" alt="" /></p>

<p>2) Right click on Card Creator, then on “Properties”</p>

<p><img src="/img/upload/1129108624_preview_02.png" alt="" /></p>

<p>3) Select the “BETAS” tab and pick the version you want (e.g: “beta” for early builds or “legacy_xxxx” for old legacy versions) on the dropdown menu.</p>

<p><img src="/img/upload/1129108624_preview_03.png" alt="" /></p>

<p>4) You are all set! If you want to revert to the lastest stable version, choose “NONE” on step 3.</p>

<p>Enjoy Card Creator!</p>]]></content><author><name>Juan Delgado</name></author><category term="Card Creator" /><category term="Guides" /><summary type="html"><![CDATA[Learn how to change to different versions of the application]]></summary><media:thumbnail xmlns:media="http://search.yahoo.com/mrss/" url="https://pixelatto.com/img/upload/beta.jpg" /><media:content medium="image" url="https://pixelatto.com/img/upload/beta.jpg" xmlns:media="http://search.yahoo.com/mrss/" /></entry><entry><title type="html">New Update 2 13 0 Excel Csv Support</title><link href="https://pixelatto.com/blog/new-update-2-13-0-excel-csv-support" rel="alternate" type="text/html" title="New Update 2 13 0 Excel Csv Support" /><published>2020-05-01T08:16:38+00:00</published><updated>2020-05-01T08:16:38+00:00</updated><id>https://pixelatto.com/blog/new-update-2-13-0-excel-csv-support</id><content type="html" xml:base="https://pixelatto.com/blog/new-update-2-13-0-excel-csv-support"><![CDATA[<p>Hi CardCreators !</p>

<p>The long awaited import &amp; export feature is finally here! You can now import and export data from/to your cardsets and between projects. This feature has been made to be flexible so it can adapt to your own workflow and needs. <strong>Please read more about this update below after the changelog.</strong></p>

<p><strong>New Features</strong></p>

<ul>
  <li>Import and export data from/to Excel files.</li>
  <li>Import and export data from/to CSV files.</li>
</ul>

<p><strong>Improvements</strong></p>

<ul>
  <li>Updated all sample projects and default blueprint.</li>
</ul>

<p><strong>Bugfixes</strong></p>

<ul>
  <li>Fix project name not being saved.</li>
  <li>Fix cardset not rendering on rare cases.</li>
  <li>Fix font not using fallback when not defined in cardset panels.</li>
  <li>Fix embedded image scaling values being ignored.</li>
</ul>

<p>Import/export data from/to Excel &amp; CSV</p>

<p>First, you need to define the panels you want to import or export its data. To do that, go to the blueprint mode and open the Advanced options in the panel, then write a field label. That label will be used to identify the data as columns in the Excel / CSV.</p>

<p>Also, very important, if you want to import data and update cards (not only add them), you need to define a way to identify each card, to do so, you need to check the “Card ID” toggle On in the panel you want to be the ID of that card.</p>

<p><img src="https://cdn.cloudflare.steamstatic.com/steamcommunity/public/images/clans/28448748/b214491af6d8a4624b31a3dfd094d4fe833bdec0.png" alt="" /></p>

<p>Once you have defined the panel names, you are ready to export or import your data! Go to the dropdowns in the navbar or the cardset. You can only export one cardset per CSV file (since they don’t have “worksheets” as Excels do). You can import Excels in either XLSX or XLSM format (the old XLS format is not supported).</p>

<p><img src="https://cdn.cloudflare.steamstatic.com/steamcommunity/public/images/clans/28448748/0894a35c391feff5be6bd40e5c33bffc4de01640.png" alt="" /></p>

<p>The first row (either in CSV or Excel worksheets) will always contain the panel names.</p>

<p>Optionally, if you name the <strong>first</strong> column “amount”, that column will be used as the amount of that card on import. On export that column will be always created in addition of the other panel columns.</p>

<p>The worksheet names in Excels will be composed by the blueprint name + cardset name separated by the character <strong>@</strong>. When importing, the worksheet names should have the same format, example:</p>

<p>blueprintName@cardSetName</p>

<p>In addition, you need to keep in mind some limitations of the Excel format:</p>

<ul>
  <li>Worksheet names max length is 31 characters.</li>
  <li>Worksheet names can’t have any of the following chars <strong>[ ] * / \ ? :</strong></li>
</ul>

<p>Worksheet those names doesn’t follow this format <strong>will be ignored on import</strong>.</p>

<p>When importing Excels, the blueprint name (in the worksheet name) <strong>needs to match an existing blueprint in the project</strong>.</p>

<p>If the cardset name is found already in the project it <em>will update or add the new cards on import</em>, if not, <em>a new cardset will be created</em> with that name in the project.</p>

<p>That’s all ! Hope you enjoy the new feature :)</p>

<hr />

<p>📌 If you have feedback or want to report an issue, please join to our <strong><a href="http://discord.gg/pixelatto">Discord server</a></strong> 💬\</p>

<p>📌 This update is released in the <strong><em>beta</em></strong> branch. <a href="/blog/beta-and-legacy-versions">Learn how to change to another branch here</a>.</p>]]></content><author><name>Juan Delgado</name></author><category term="PatchNotes" /><category term="Guides" /><summary type="html"><![CDATA[Now you can export/import your project using excel/csv files]]></summary><media:thumbnail xmlns:media="http://search.yahoo.com/mrss/" url="https://pixelatto.com/img/upload/card-creator-patch-notes-2-13-0.png" /><media:content medium="image" url="https://pixelatto.com/img/upload/card-creator-patch-notes-2-13-0.png" xmlns:media="http://search.yahoo.com/mrss/" /></entry></feed>